jasonwryan.com

Miscellaneous ephemera…

Setting tmux statusbar if in X

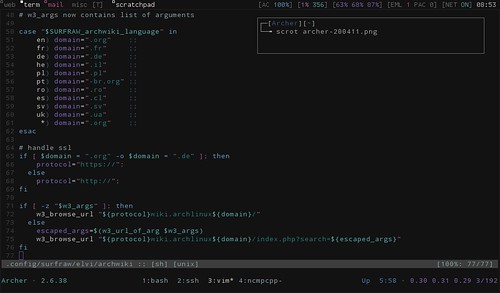
Arch Linux: dwm, tmux & scratchpad

I have been posting quite a bit about tmux of late1. It is a marvellous application and lends itself to all sorts of interesting uses. When you first install it, you will find a number of user config files in /usr/share/tmux/. I started with tmux by copying Thayer’s config across and then working up from there. There is a section at the bottom of this file that has always puzzled me, and so I decided to get to the bottom of it.

1
2
# show some useful stats but only when tmux is started
# outside of Xorg, otherwise dwm statusbar shows these already 

It is a great idea. If you are running tmux in X, then you have dwm’s status bar telling you what the time is, how much battery you have left etc,. You don’t need to replicate that functionality in tmux. If, however, you are in the console, you don’t have that information, unless you print it in tmux’s statusbar.

I had tried to get this to work once or twice over the last couple of years, but never persevered with it. However, as I have been doing a bit of work making the console as functional as possible2, I thought I would revisit it.

image

The insight that I had that got it working for me was to use the source-file option in .tmux.conf to call the relevant statusbar, depending if X was running or not. I just adapted Thayer’s code, like so:

1
2
3
# Statusbar starting in X or not
if '[ -n "$DISPLAY" ]' 'source-file ~/.tmux/inx'
if '[ -z "$DISPLAY" ]' 'source-file ~/.tmux/xless'

And then created those files with the desired statusbar options. So, for example, if I am running tmux in the console, $HOME/.tmux/xless is loaded:

1
2
3
4
5
# Statusbar if tmux run in console
# information normally in dwm bar
set -g status-right-length 50
set -g status-left-length 50
set -g status-left "#[fg=green] #H #[default] …blah, blah, blah…

Which prints a statusbar with the time and battery left on my laptop3:

image

All the relevant files are in my mercurial repo.

Notes
  1. Copy & paste in tmux, Sessions in tmux & Introduction to tmux

  2. Vim colours in the console

  3. Image squashed to fit the requirements of this blog…
Copy & Paste in tmux

image

I’ve posted a couple of times1 about tmux, the brilliant terminal mutliplexer. One question I see raised a lot in #tmux is how to copy and paste.

The documentation for tmux is excellent: the man page one of the most clear and thorough I have read. And while it is explained there, I thought I would share my approach anyway.

First, I set tmux to use vi keys:

1
setw -g mode-keys vi

Then I change the default keybinds to suit my workflow. As explained in the man page, the default keys to enter and exit copy mode are [ and ] respectively. I reset those in my .tmux.conf to more intuitive and Vim-like keys:

1
2
3
4
5
6
unbind [
bind Escape copy-mode
unbind p
bind p paste-buffer
bind-key -t vi-copy 'v' begin-selection
bind-key -t vi-copy 'y' copy-selection

This seems a lot closer to all of the other Vim-like apps that I run - where Escape changes the mode, v begins visual selection, y yanks text to the buffer and p puts text copied from the buffer.

So, to string it all together, the command sequence necessary to copy some text from tmux and paste it is now (I bind my prefix to t):

Ctrlt,Escape   # enter copy mode
# move cursor to the start or end of the desired text string
v                        # to activate highlighting
# move cursor to cover the requisite string
y                        # to capture the string
q                        # exit copy mode
Ctrlt,p       # put/paste the text in the desired location

Simple.

This means that you can scroll back through the output of anything in your terminal, and copy and paste it anywhere. Once you set it up, it is a very powerful tool…

Notes

1.tmux - Terminal-multiplexer & Sessions in tmux

Network Flooding on Ubuntu

image

I have been experiencing problems with my wifi LAN when playing music through mpd or watching movies. My upload speeds would climb to around 120-130Kb/s and my wifi would just go down.

Apart from being frustrating, this was inconvenient as it meant that if I was doing either of those things, my stereo in the living room couldn’t stream music from my squeezebox server, or other members of the family (or guests) couldn’t connect to the access point to get online.

After asking on Ask Ubuntu (which, like many of the Ubuntu-related fora is populated with people who are more well-intentioned than they are knowledgeable - which seems to me one of the fundamental problems the distro has; but I’ll save that rant for another day), one helpful user suggested I use wireshark to diagnose the network traffic.

I really should have thought of that myself. Nonetheless, it was immediately instructive. Wireshark quickly identified that, as soon as I started mpd, one of my ports was being flooded: 46560

lsof showed that pulse audio was the culprit:

1
pulseaudi 2190 jason 39u IPv4 14110 0t0 UDP mybox:56751->224.0.0.56:46560

Quelle surprise… When software engineers want a case study of opacity and abstraction from the user, this should be their first port of call.

Worse, it is a known bug. First logged in August, 2009. And apparently insufficiently serious to warrant any attention. Fair enough, I suppose, given the fix is easy enough if you know what you are trying to fix…

Install the Pulse audio preferences tool:

1
sudo apt-get install papref

…and disable Multicast/RTP.

Another example for me of Ubuntu’s fast waning utility as a distribution for people that want to be able to exercize some control over their system. It is only still installed on this machine because there isn’t an official Arch Linux mirror here and, with my international traffic capped to 30Kb/s until last month, I wasn’t prepared to try and run a distro on that sort of bandwidth. Now that has changed, I suspect that Ubuntu’s days are numbered on this box.